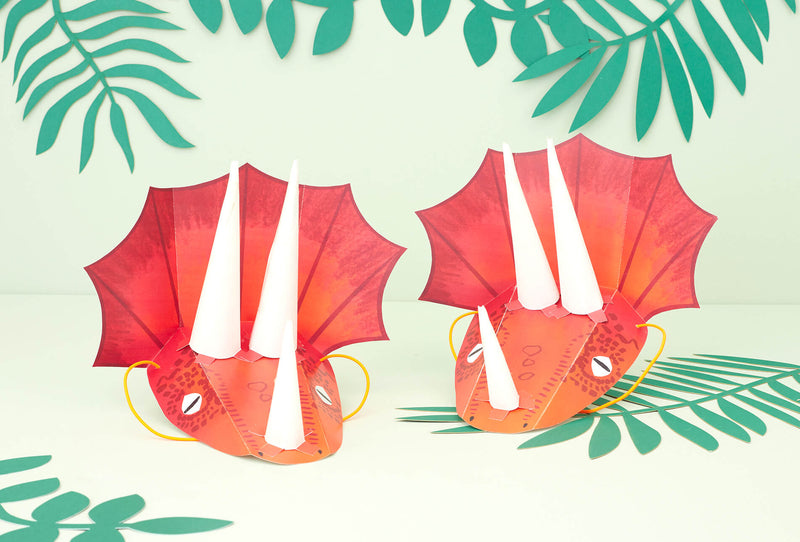
Triceratops fans will love transforming into their favorite dino with this easy headpiece to make at home.
The Party Edit
From dream party themes to brilliant birthday party ideas and star interviews, inspiration for every event starts here!

How to Plan the Best Bridal Shower
As the big day approaches, one of the most exciting pre-wedding events is the bridal shower – a celebration of the bride-to-be with her closest friends and family members. Whether you’re a trusted friend [...]
CONTINUE READING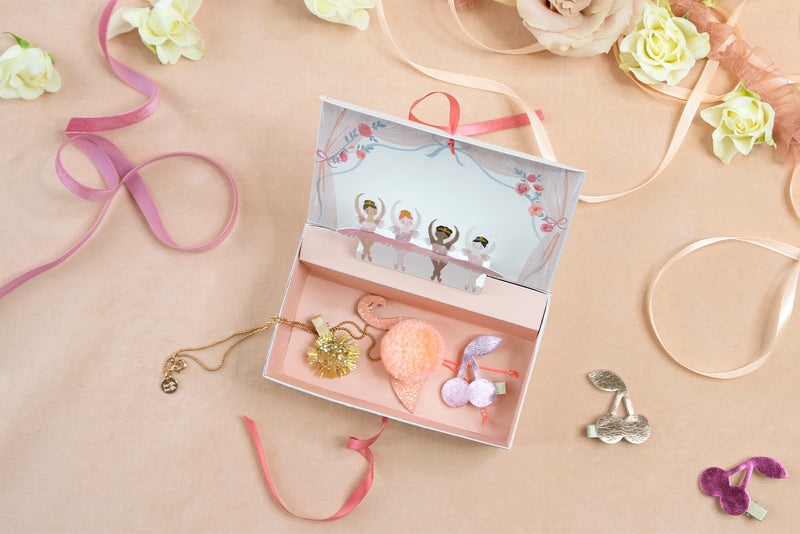
Free Craft Activity: Make Your Own Ballerina Jewelry Box
This beautiful jewelry box is easy to make with just card and ribbon, using our free downloadable template. A perfect rainy-day activity, or used as favors for a ballet-themed party – just write each guest’s name in the frame provided.
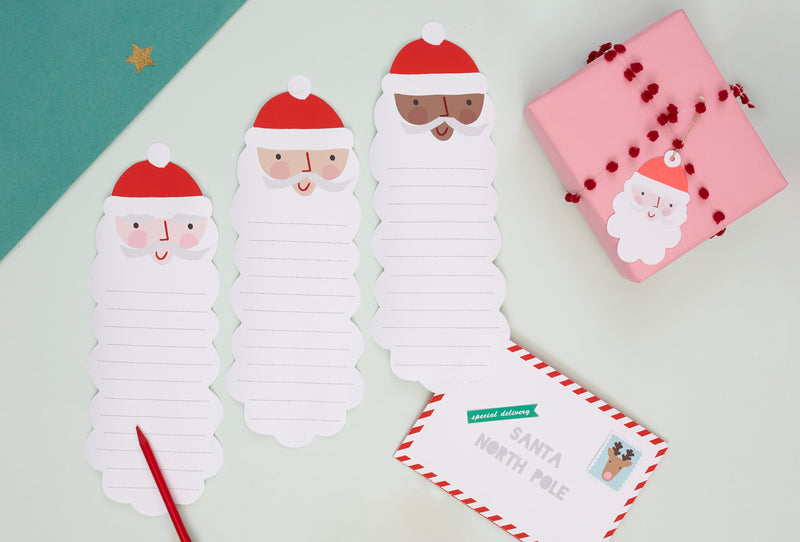
Free Craft Activity: Send Santa a Letter
Keep the Christmas magic alive by sending Santa a letter and crafting a reply! With our free, printable templates & top tips for writing a response, you’ll ace the holidays this year
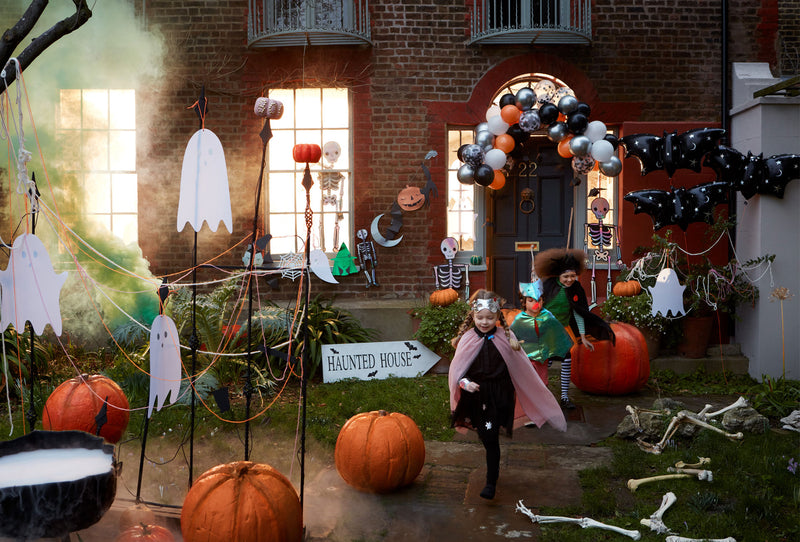
Create a Haunted House
Make your home look Halloween ready with lots of sensational scary and eye-catching decorations. Here are our top 5 tips. 1. Entrance Hall Horrors Even if you don’t have guests around, it’s still a brilliant idea to make your entrance hallway look amazing as it’s the opening into your haunted house. Balloons look fabulous tied on and above doors, like our sparkly bat foil balloons and giant spider balloons. Place Halloween heads in the windows, like Frankenstein’s monster, Dracula and skulls, for an eerie effect. Make them out of card and color in. Add lots of shiny foil to add shimmer at night, like our sparkly silver mylar tape. 2. Creepy Corridors Children will love a terrifying thrill when they peek around corners and zoom along corridors. We recommend hanging decorations from the ceiling, that they need to avoid bumping into. Lots of fake cobwebs and spiderwebs are a must! Shop our Halloween Collections To make cobwebs: Stretch out cotton ball pieces until thin and spray with hairspray to stick them together. Place on brick walls or hang from lights. To make a spider web: Place two pipe cleaners on top of each other, and twist together to make ‘arms’ in an X shape. Twist a third pipe cleaner once around the centre of the X to make two more ‘arms’. Ensure each of the six ‘arms’ extending from the center are even. Wrap a 3 foot long piece of cotton thread around the ‘arms’ in a spiral pattern. Add a dab of glue at the thread twists to help keep them in place. Tie the thread into a knot once you’ve finished the spiral, and create a loop at the top of the cobweb for you to easily hang it. For more spiderweb and cobweb ideas go here. 3. Party Room Portraits Haunted houses are always full of scary portraits to give lots of atmosphere. Print out or draw freaky faces and put them in frames. Or hang up our Halloween motif frame plates featuring Dracula, Luna Witch, Midnight the black cat and a Jack o’ Lantern. Lots of candles are a great way to add a scary illumination to the portraits. Pop them into mason jars, which you can cover on the outside with cobwebs or black lace. For more Halloween candle decoration ideas go here. You can also decorate toilet roll inners and tape electric candles on top for a ‘fake candle’ look, which is safer if you’ve got very little people in the house. 4. Piñata Party Time A piñata is excellent as a decoration and a fun way to get candy too! Why not make your own as a great craft project with your kids? Here’s how to make a Frankenstein Monster piñata and a Jack o’ Lantern piñata. Or, if you don’t have the time or inclination to make one, take a look at our wonderful witch piñata with lots of shimmering holographic foil. 5. Sticker Solutions A set of Halloween themed stickers can give you a multitude of decorations – pop them onto pumpkins, candlesticks and posters. We’ve got glittery stickers or ones with fun googly-eyes.
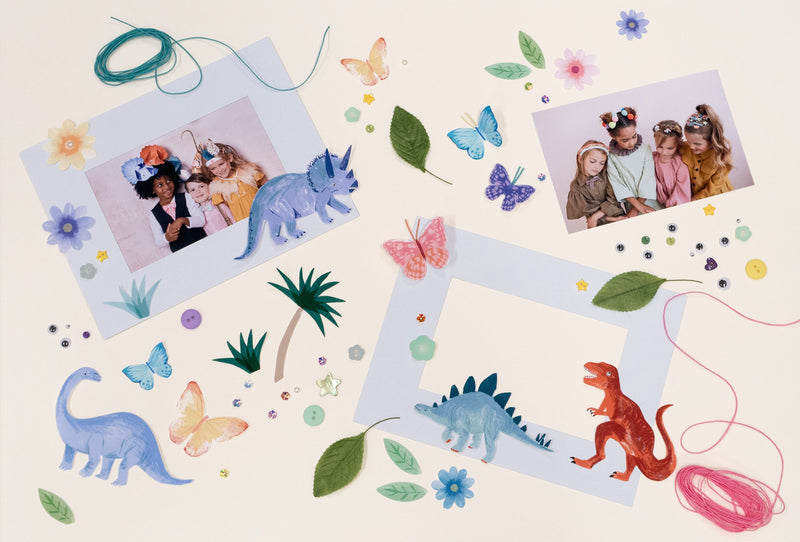
Free Craft Activity: Make a Picture Frame
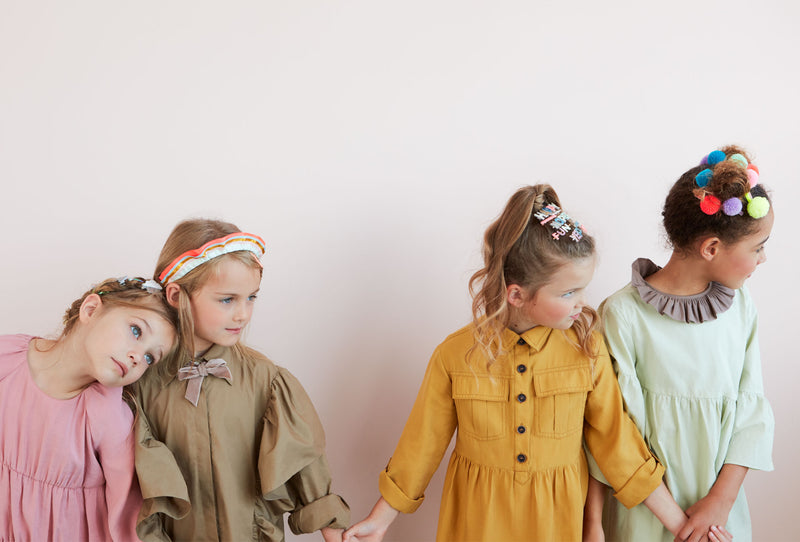
Make a Picture Frame A homemade picture frame makes a gorgeous gift for granny, or for you or your kids to keep a favorite photograph in. Our talented design team have created two 3D frames for you to make – beautiful butterflies or dynamic dinosaurs. We also share our top ideas on how to take the perfect photographs to pop into your frames. Create a Fabulous Frame Make your photographs look amazing with these butterfly or dinosaur frames. Click here to download the free templates. To make the frames you will need: A printer, printer paper and card, scissors, glue or sticky foam pads, thread, cord or craft wire, sequins, beads and googly eyes. You can also use stickers for decoration (we’ve got a wide range, check them out here). And, of course, you will need a fabulous photograph to frame! (6” x 4” size). Step 1: Print out the templates for the frames onto paper and glue onto card or print it straight onto card. The stand piece will ideally need to be glued to a thicker piece of card or to two pieces of thin card to give it extra strength. Print out your choice of illustrations from the templates. Cut out all the pieces you wish to use. Step 2: To make the frame, first decide if you want it to be landscape or portrait (this will obviously depend on the photograph you want to frame). Take the back piece and glue along the shaded areas (itʼs important you only glue the 3 sides so you can easily slide your photo in at the end!). Then stick the front of your frame to the back piece. For the stand, firstly fold along the dotted line. Lay the stand down flat on the back of your frame so that the short side is parallel with the bottom of the frame. Stick the top part of the stand down as shown. Step 3: Now for the decorations. Use glue or sticky foam pads to attach your characters to make your frame really stand out. The butterflies can be made to look 3D by folding them in half and using thread, cord or craft wire to make antennae. Or add googly eyes to the dinosaurs. Then just have fun adding on as many embellishments as you like. Or why not try personalising your frame with some of our sensational stickers? Step 4: Once youʼre happy with your design, finish off by sliding your chosen photo into the frame. Take the Perfect Photograph 1. Get your subject off-center. Apparently, it’s a common mistake to think the subject of your photographs should be directly in the center of the shot. However, this is said to reduce overall visual interest, causing a less than stimulating effect. So, get your subject to stand slightly off-center for a more interesting result. 2. Bigger is better. A lot of people have the subject of their photograph too small in the shot. So, zoom in or get closer with your camera. 3. Go for patterns. Our eyes love patterns, so make your photograph more exciting by including lots of them in the shot – so this could be with clothing, accessories (check out our amazing hair accessories, enamel pins, embroidered brooches and necklaces) or your background, like flowers, trees or a colorful painting.

Free Craft Activity: Hoopla Party Game Fun
Hoopla is an excellent game for kids of all ages to play. Perfect for parties or whenever they want to have fun. We’ve designed a colorful hoopla game for them to create, easily made from paper card and paper straws. We also reveal our favourite classic party games, which we know you’ll love too. Make the Hoopla Game Who can get the highest score? This is an amusing traditional game for the kids to make and play. Click here to download the template. You will need: A printer, paper and card, glue, scissors, sticky tape, 5 paper straws (cut to a length of 5.5 inches/14 cm. We’ve got a great range of glittery and striped straws, see here.) and pencil and putty (or any tool for making holes in the card). How to Make: Step 1: Print out the template for the base and the hoops, and glue them onto the card. Step 2: To attach the straws, pierce holes into the base where the X’s are marked by placing a piece of putty underneath and pushing through a pencil. Make sure the holes are big enough for the paper straws.Step 3: Push the straws through the holes by approximately half an inch. Cut three slits into the bottom of each straw and fan out the slits. Tape them down flat to the underside of the base piece so that the straw stands upright. Repeat this until you have stuck down all 5 straws. To make the straws extra secure, you could glue an extra piece of card to the underside of the base.Step 4: Cut out the hoops and now you’re ready to play! Each straw is worth a different number of points. Each player throws their 4 hoops and writes down their score. Whoever scores the most points after all the players have had their turn, wins! The 3 Most Fun Party Games Ever! Our hoopla game will be a highlight of your party. Here are some other traditional games we love too – which can all have a different twist if you want to match your party theme. 1. Pin the Tail on the Donkey We’re sure you know this classic game, where blindfolded children stick a paper tail on a picture of a tail-less donkey, and the winner is the child who gets it as close to the point where the tail should be. But, have you considered tweaking this game to match your party theme? For example, ‘pin the jewel on the tiara’ for a princess party or ‘pin the patch on the pirate’ for a pirate party. Let your imagination flow! 2. Memory Game A great game to play when the kids need a bit of quiet time, or at the end of the party to get calm before they head home (parents will thank you for this!). All you need is a tray filled with memorable objects, along with a pen and paper for each child. You can make the objects match your party theme. For example, if you’re having a mermaid party, then all the objects can be underwater themed like seaweed (green tissue paper), fish candies, fish scales (sequins), a seashell and plastic whales/dolphins and turtles. Place the tray with objects in the centre of the table and set a timer for one minute to let the kids gaze at it and memorise everything. When the minute is up, remove the tray and everyone has to write down as many objects as they can remember. The child who remembers the most is the winner. 3. Musical statues and bumps Get the kids to burn off their party excitement with lots of musical games. For this, you’ll need a funky playlist, check out our Meri Meri Summer of Fun Playlist on Spotify. For musical statues, put the music on and get the kids to show off their most impressive dance moves. They then need to keep statue-still when the music stops and they’re out if they wobble. Keep playing until one person, the winner, is left. And have you tried musical bumps? Instead of standing still the players have to sit down quickly when the music stops. The last person to sit down is out. You could make this even more relevant to your party theme by getting the children to sit in special areas. For example, if you’re having a space party divide the room into the ‘Moon’, Neptune’ and ‘Mars’ zones. Tell the children to sit in a specific zone when the music stops, varying the zone each time. This will cause lots of running about which will wear the little darlings out! And have you tried musical bumps? Instead of standing still the players have to sit down quickly when the music stops. The last person to sit down is out. You could make this even more relevant to your party theme by getting the children to sit in special areas. For example, if you’re having a space party divide the room into the ‘Moon’, Neptune’ and ‘Mars’ zones. Tell the children to sit in a specific zone when the music stops, varying the zone each time. This will cause lots of running about which will wear the little darlings out!Make your birthday parties even more special with fabulous tableware and decorations. We’ve got many fantastic ranges with popular themes like unicorns, space, princesses, mermaids, pirates and knights. Or you can never go wrong with a Happy Birthday themed party! Check out our range, which includes colorful and pastel choices.
Craft a Friendship Bracelet
Craft a Friendship Bracelet Little people love to show their friends and family they adore them – and what better way than with a hand-crafted colorful friendship bracelet? Our talented design team have created one for your kids to make and give as a gift to their favorite person or people. We also share other craft creations, to team with the bracelet, to make it even more exciting to give and receive. How to Make the Bracelet Simply click here to download the template to make your beautiful bracelet. You will need: A printer, paper and card, scissors, pencil and ball of putty (or something to make a small hole in the card), 7 strands of thread (embroidery threads work well), each approx 20 inches long. Instructions: Step 1: Print out the loom template and stick onto some card. Cut it out and make cuts along each of the small lines. Step 2: Make a hole in the middle of the loom by putting a ball of putty underneath and pushing through a pencil.Step 3: Take 7 strands of thread and knot them together at one end, leaving an inch of thread loose at the end so you have a decorative tassel. Step 4: Push the knotted end through the hole in the middle of the loom so the knot is on the underside. Step 5: Thread each of the strands through each of the slots, you should be left with one empty slot. Step 6: Hold your loom so the empty slot is at the top. Count 3 strands to the left and move this third stands into the empty slot. Step 7: Turn your loom so the new empty slot is at the top. Count 3 strands to the left again and move it to the empty slot.Step 8: Keep repeating stage 6 and 7 and you’ll see your friendship bracelet grow from under the loom. Keep the threads nice and tight in the slots as you continue making your bracelet.Step 9: Keep going until your bracelet is long enough to tie around your wrist. When you are happy with it, remove it from the loom, tie a knot in the end and cut off the loose threads, leaving an inch at the end to make another tassel. Now you can make as many as you like and give them to your friends! 3 Friendly Ways to Present Your Bracelet 1. In a card. If you can’t see your friends at the moment, then send your bracelets by post inside a special homemade card. We’ve created 3 amazing notecards for you to make – an adorable sausage dog, dreamy sailboat and a cherry ice-cream, go here for the instructions and downloads. As an extra touch, why not include a quote about the wonders of friendship?Here are our favorites: “A sweet friendship refreshes the soul.” - Proverbs 27:9 “Many people will walk in and out of your life, but only true friends will leave footprints in your heart.” - Eleanor Roosevelt. “There is nothing I would not do for those who are really my friends.” - Jane Austen. “The only way to have a friend is to be one.” - Ralph Waldo Emerson. “Friendship is the only cement that will ever hold the world together.” - Woodrow Wilson. 2. Pop it into a piñata. Little piñata favors are the perfect way to present your bracelet to a friend. Put it inside and they’ll get a lovely surprise when they open it. Make your own mini piñata, go here for ideas or choose one of our lovely designs which include unicorns, llamas, skull and crossbones, flamingos, swans, robots, mermaids, crocodiles and rainbows. 3. Include it with a gift. If it’s your friend’s birthday then you may want to team your homemade friendship bracelet with another gift too. Look for presents that have a true friendship meaning, like our Secret Notebook necklace or a notebook for them to write notes to you, like our sausage dog, unicorn and cat notebooks.
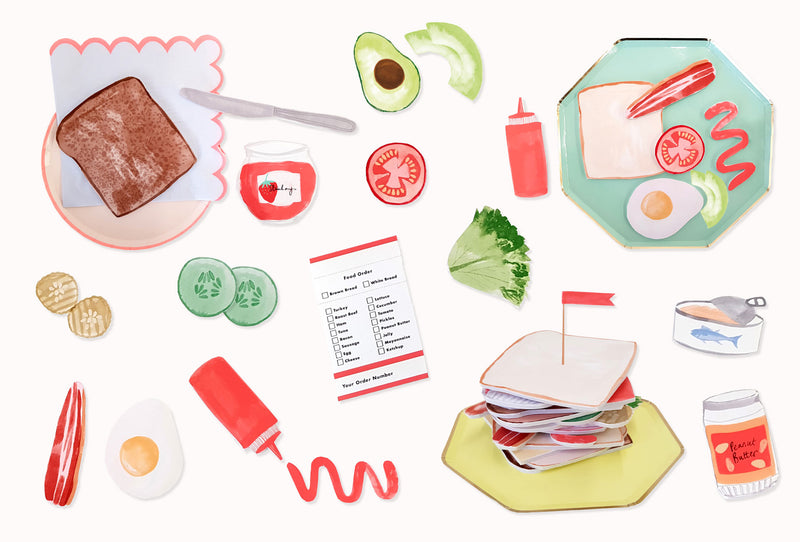
Sensational Sandwich Make
Sensational Sandwich Make Your kids will love to pretend to have their own deli– taking everyone’s orders and then making a ‘meal’ to remember. Our clever designers have created menus and lots of food items to print out and play with. We also share our favorite party sandwich ideas. Order, Create and Serve The fabulous foods include bread, tomato, lettuce, turkey, roast beef, bacon, avocado, peanut butter, strawberry jelly, tuna, cheese, pickles, cucumber, a fried egg, mayo, tomato ketchup and there’s even a ‘knife’ to use. Perfect for culinary creativity. Click here to download the templates Simply print out all the menus and food items onto card (or print onto paper and then glue onto card), cut them out and get ready for fun.Why not get your kids some paper party plates and napkins to serve their ‘food’ on too? We’ve got fabulous ranges to choose from with amazing designs and all the colors of the rainbow. Perfect Party Sandwich Ideas If playing with pretend sandwiches has made everyone hungry, it’s time to rustle up some of the real thing. Here are three ways to make them with a difference to turn the meal into a party! 1. Make works of art With the clever use of ingredients you can make sandwiches look like charming creations. We love these crazy crab and sailboat sandwiches, these woodland animal sandwiches, and this remarkable race car sandwich. 2. Shape them up Transform a humble sandwich into a special shape to really delight the kids. Do this with your favorite cookie cutters, or cut them with a knife. We’ve got a great stainless steel cookie cutter range, including a unicorn, sausage dog and flowers. 3. Switch up your sandwich type A sandwich doesn’t just have to have 2 slices of bread. Why not try an open sandwich, pinwheel or a multi-tiered variety where you use a selection of different breads and fillings? Go here for more information.
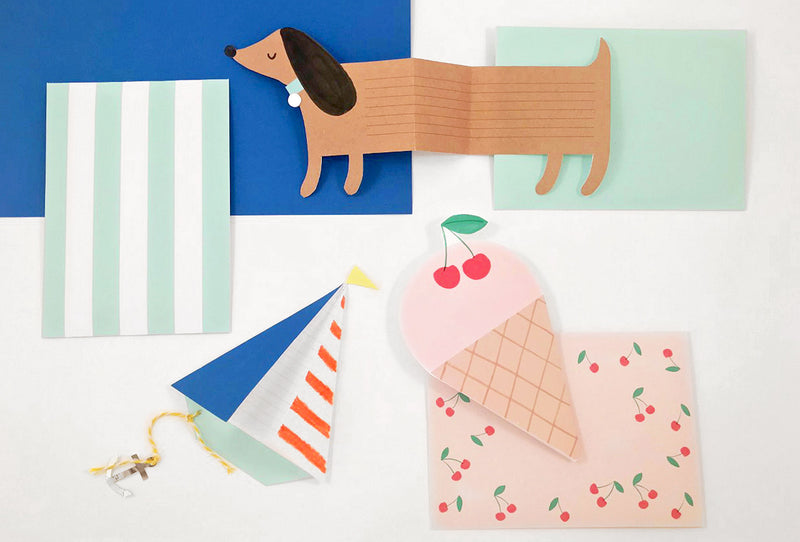
Nifty Notecards to Make
Nifty Notecards to Make Why send a letter to friends and family on plain paper, when you can send them something really special? Our fabulous designers have created not 1, not 2, but 3 fabulous notecards for you to make. We also share our favorite famous inspirational quotes, perfect to add to your notes. Three Terrific Notecards There’s something to suit everyone – an adorable sausage dog, a dreamy sailing boat or a delicious looking ice-cream. You will need: a printer, paper/card, scissors, coloring pencils or pens, twine, tape or glue, foiled card and colored paper (optional). Please go here for the templates. Boat Notecard Step 1: Print out the sheets and cut out the notecards with scissors. Step 2: Fold back the sails along the dotted lines. You will need to add color. You can do this with coloring pencils or you can cut out the sails from colored paper. We found that stripes work really well on one of the sails. Step 3: Use the anchor template on some silver foiled card or you can just color it in using a silver pen. Step 4: Poke a hole in the top of the anchor using a pencil and then another in the main part of the boat. Step 5: Next take your twine and tie to the anchor and then the boat. Step 6: Glue the flag in the middle of the sails. Sausage dog and Ice-cream notecards Step 1: Print out the sheets and cut out the notecards with scissors. Step 2: Fold along the dotted lines. The ice cream notecard folds in on itself and the sausage dog folds like a concertina. Step 3: (Sausage Dog only). Cut the round tag for the dog collar from some silver foil card or color with a silver foil pen, and glue on to the collar. Step 4: Stick the flaps down using glue or tape. Write your notes and send to your friends or family. For extra embellishment you can decorate the envelope and card with lots of fun stickers. We’ve got a great range including unicorns, mermaids, tropical, space and many more. Famous inspirational quotes Want to add something inspirational to your notes, but can’t find the words? Try using these quotes from famous people. “Imagination is more important than knowledge.” - Albert Einstein. “Keep your face always toward the sunshine—and shadows will fall behind you.” - Walt Whitman. “It doesn’t matter how slowly you go, as long as you do not stop.” - Confucius. “All our dreams can come true if we have the courage to pursue them.” - Walt Disney. “Nothing is impossible, the word itself says ‘I’m possible’.” - Audrey Hepburn. “What lies behind you and what lies in front of you, pales in comparison to what lies inside of you.” - Ralph Waldo Emerson “If you hear a voice within you say ‘you cannot paint’, then by all means paint and that voice will be silenced.” - Vincent Van Gogh. “Believe you can and you’re halfway there.” - Theodore Roosevelt. “Don't cry because it's over, smile because it happened.” - Dr. Seuss
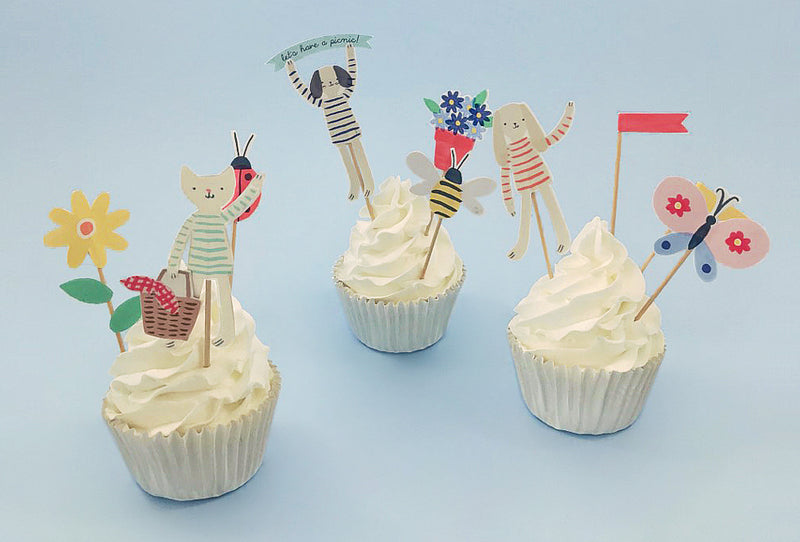
Free Craft Activity: Picnic Cake Toppers
Delight your little ones with our adorable, printable cake toppers and read our tips on how to create the perfect picnic complete with delicious treats!
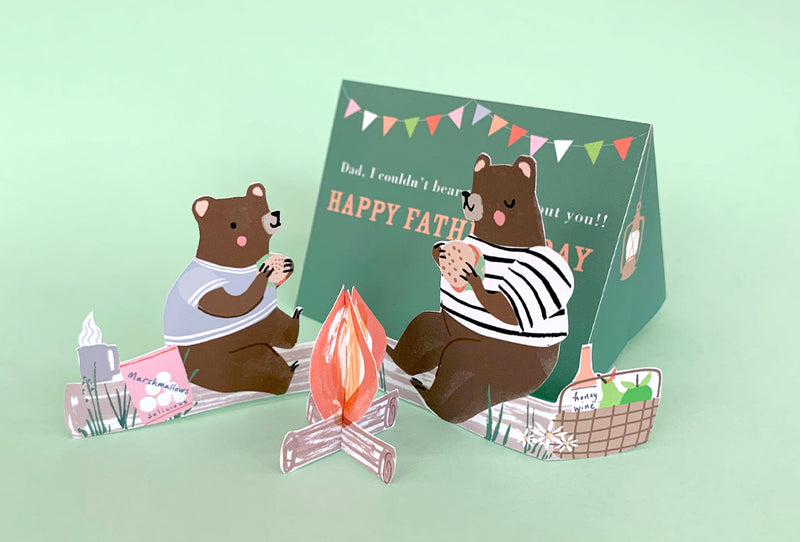
Make a Fabulous Father’s Day Card
A sensational card is the perfect way to say you care. It’s even more wonderful if your kids craft it especially for their dad. So, our creative designers have made a charming card to make that will really delight.
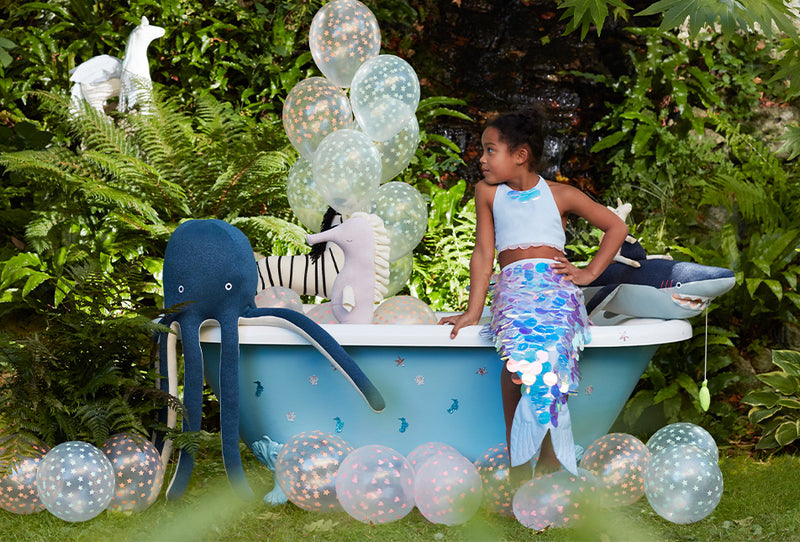
Make a Mermaid’s Tail
If your kids love to dress up, they’ll adore our mermaid tail make crafted from metallic cupcake cases. Perfect for little mermaid and mermen imaginative play. We also share our favorite under-the-sea game ideas.
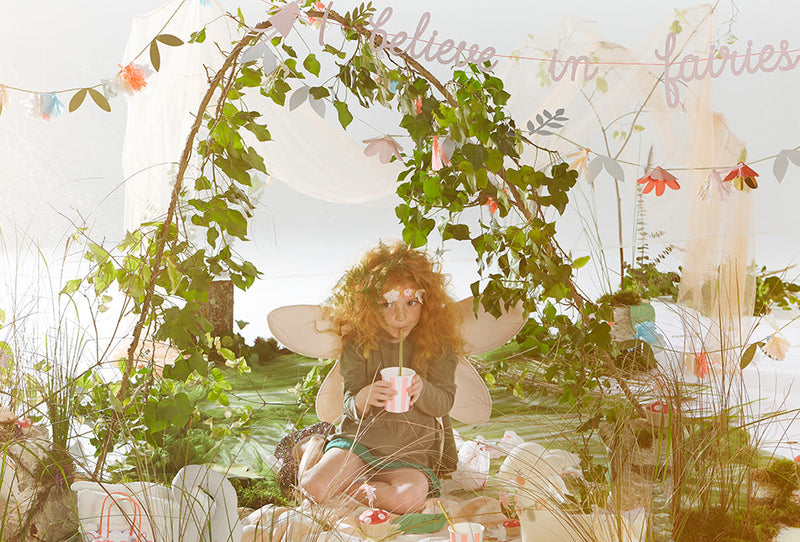
Fabulous Flower Crafts
Your garden is full of potential for beautiful crafts to make with your kids. Our talented designers have created amazing butterfly wings, made with petals, leaves and flowers – they look so beautiful!
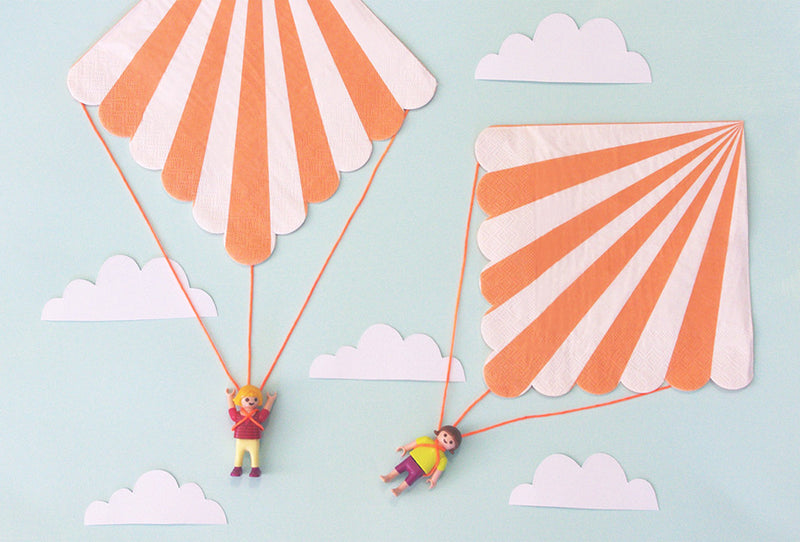
Flying fun
Little boys and girls love to pretend to fly, whether it’s by dressing up as a rocket to zoom to the moon, or wearing a superman or superwoman cape. Playing with toys that fly is also amazing fun. So, our designers have created a special napkin parachute for your kids to make.